
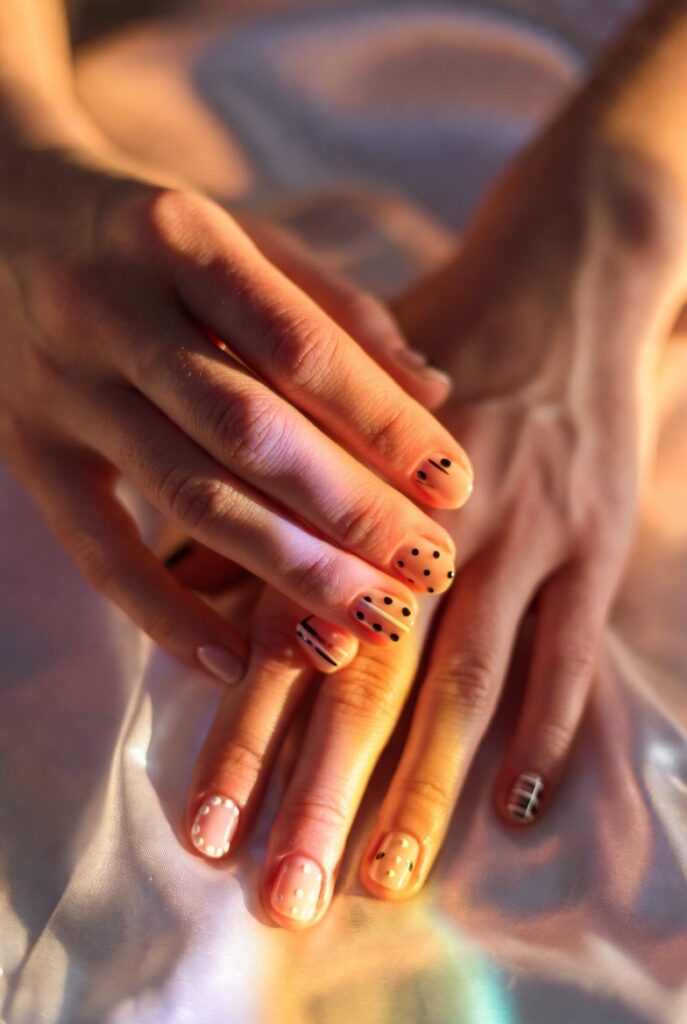
Short, polished nails can be just as striking as long ones when you know a few clever tricks. Many people assume creative nail art requires hours of practice or expensive tools, but the truth is that simple nail designs often look more refined and professional than complicated patterns. With the right approach, you can transform a basic manicure into a personal style statement that complements your wardrobe and lifts your mood. This article walks you through twenty‑three gentle ideas that work for beginners, busy parents, or anyone who wants to keep their nails looking fresh without spending a fortune at the salon. Each concept focuses on effortless elegance and uses materials you likely already own, so you can experiment freely on a lazy Sunday afternoon or just before a dinner date.
Classic French Fade with a Soft Gloss
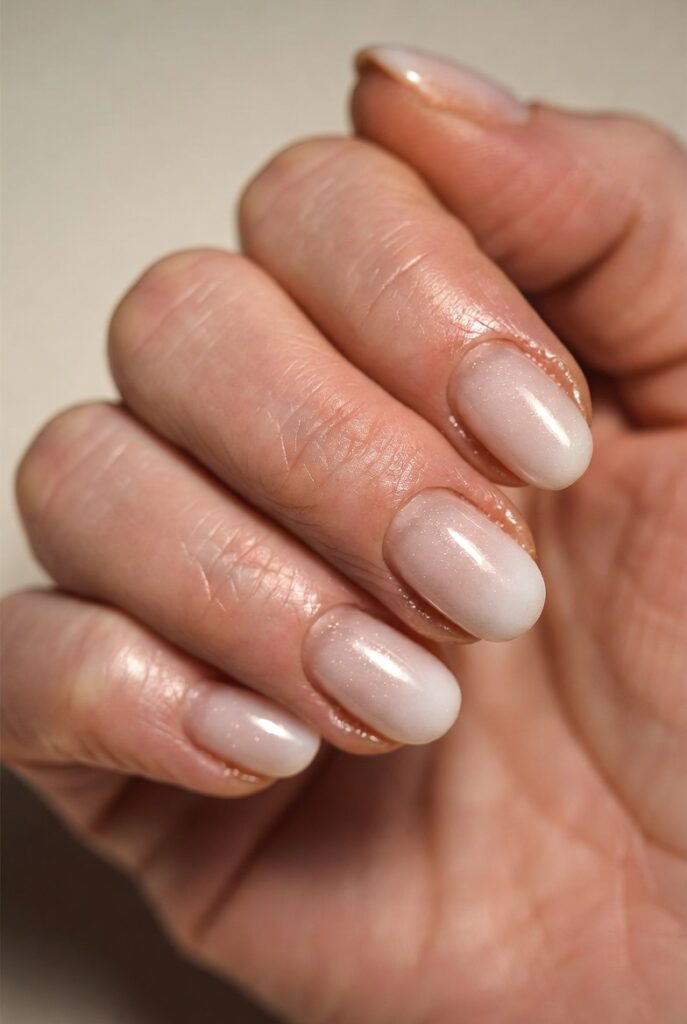
The French fade, sometimes called the baby boomer nail, creates a seamless transition from a nude base to a milky white tip. Unlike the stark line of a traditional French manicure, this version blends colors softly, making it much more forgiving if your brush slips. Start with two thin coats of a sheer pink or beige polish, then use a makeup sponge to dab a whisper of white polish onto just the tips. The sponge’s porous texture diffuses the pigment naturally, so you don’t need surgical precision.
Once the white layer dries completely, seal everything with a high‑shine top coat. This design looks elegant on short nails because the gradient draws the eye upward, creating the illusion of length. It also grows out gracefully, meaning you can go nearly two weeks without visible gaps. Many women love pairing this manicure with gold rings or a simple leather watch, as the soft gloss catches light without competing for attention. For an extra touch of sophistication, try warming your top coat bottle in your palms before applying it; warm polish flows into a smoother, glassier finish.
Single Stripe Down the Center
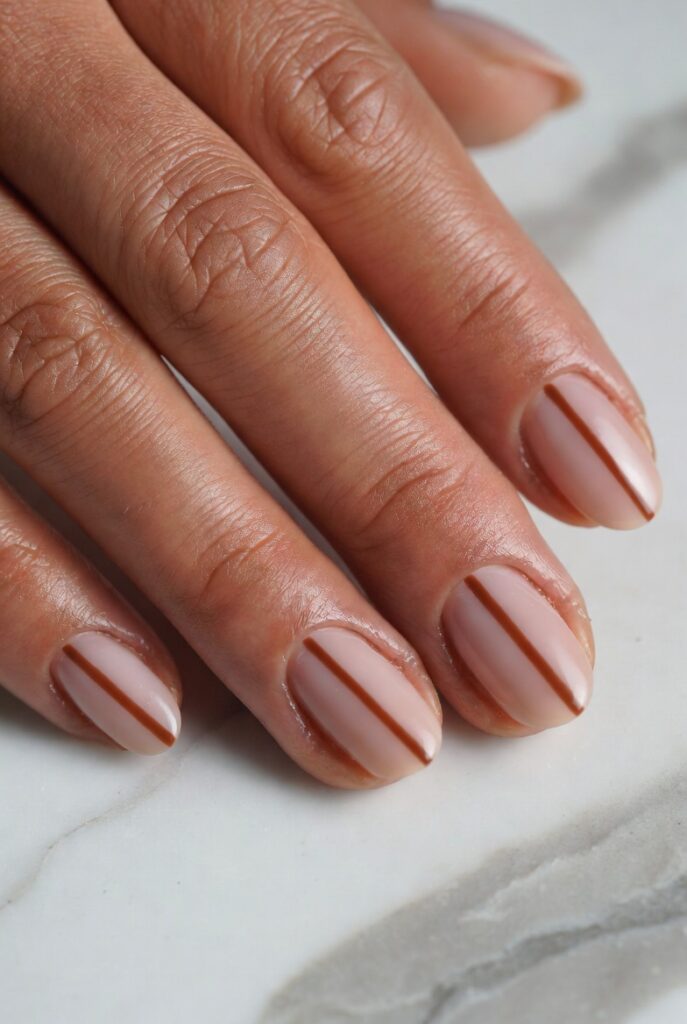
A lone vertical stripe running from cuticle to tip is one of the most forgiving simple nail designs for shaky hands. Choose a contrasting color, such as metallic silver over a dusty rose base, and use the thin brush that comes inside the polish bottle rather than buying specialty tools. Rest your painting hand on a flat surface, exhale slowly, and drag the brush in one steady motion. If the line wobbles slightly, do not panic—imperfections look intentional when the stripe is centered.
This design works beautifully on oval or squoval nails because the vertical line elongates the finger shape. You can also experiment with matte and gloss finishes by painting the stripe with a clear matte top coat over a shiny base. The real beauty of this idea lies in its speed: from bare nail to finished look takes under ten minutes, including drying time. Wear it alone for a minimalist vibe or stack two thin stripes side by side for a subtle racing‑inspired detail.
Two‑Tone Horizontal Blocks
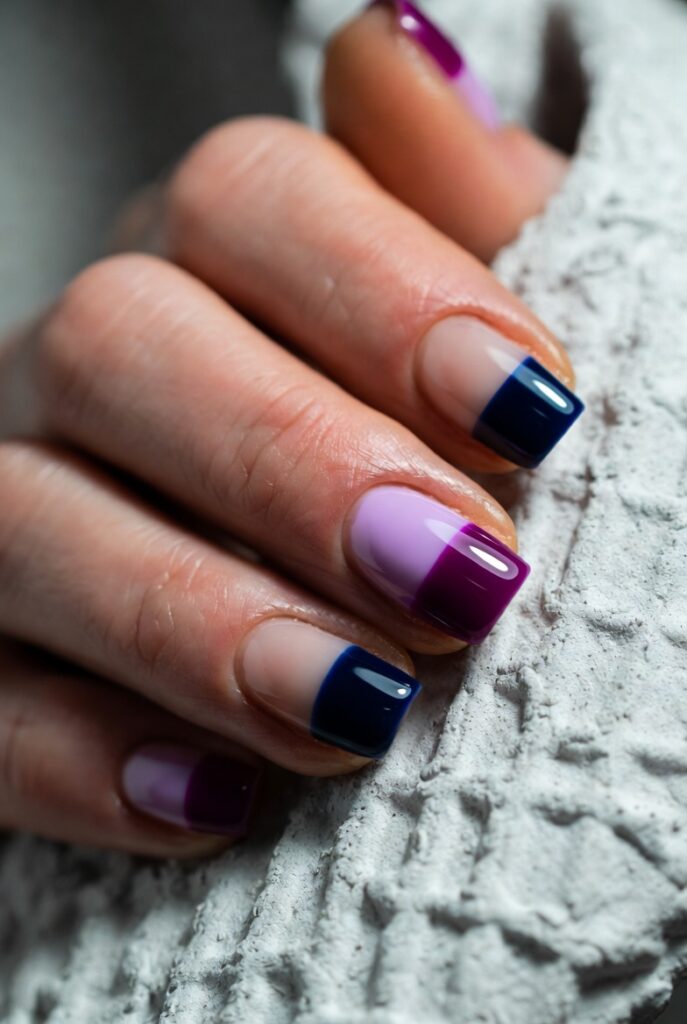
Divide your nail into two clean horizontal sections, such as a pale lavender upper half and a deep plum lower half. The trick to sharp lines is waiting for the first color to dry completely before applying painter’s tape or a strip of ordinary Scotch tape. Burnish the tape edges with your fingertip so polish cannot seep underneath, then paint the second half and remove the tape immediately while the polish is still wet. This prevents peeling later.
You can reverse the block order on different fingers for a playful mismatched look. Because the blocks are bold and graphic, they hide small mistakes at the boundary line—a slightly wavy edge reads as artistic texture rather than an error. Neutral colors like cream and taupe create an office‑appropriate manicure, while neons like coral and electric blue scream summer barbecue fun. To keep the design from feeling too harsh, finish with a jelly‑like sheer top coat that adds dimension without altering the colors.
Polka Dots Using a Bobby Pin
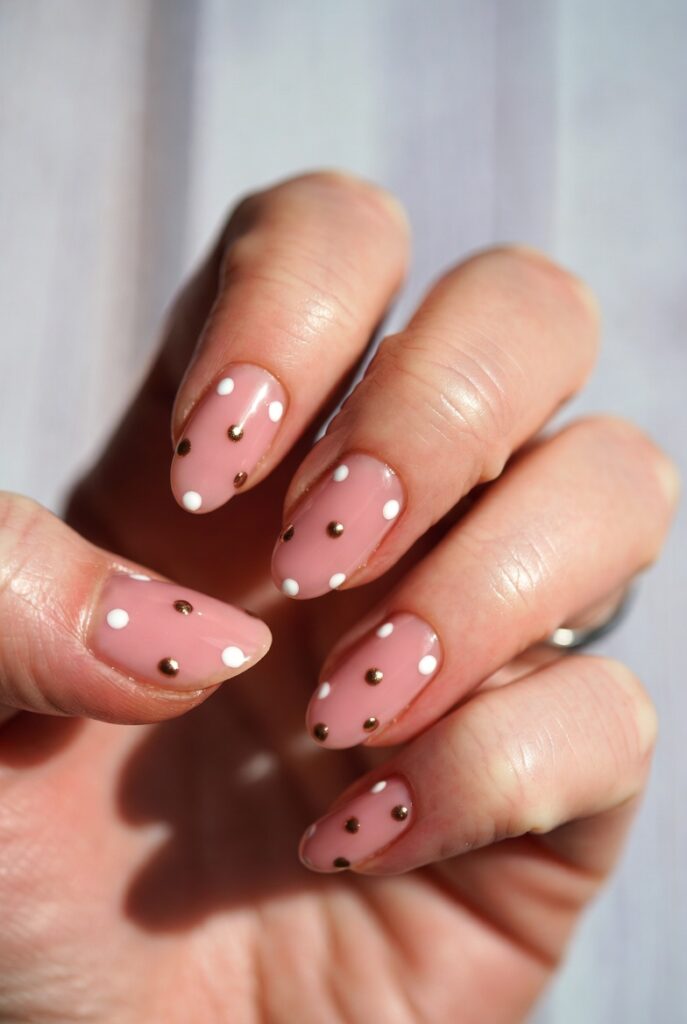
You do not need dotting tools to create charming polka dot nail art; an ordinary bobby pin works wonderfully. Dip the rounded end into any polish, wipe off the excess on the bottle neck, then press gently onto your dry base color. The size of the dot depends on how much polish you leave on the pin—a thin coat makes tiny dots, while a thicker blob gives larger circles. Scatter three dots in a triangle pattern near the cuticle and three more near the tip for a balanced composition.
This design feels cheerful and whimsical without looking childish, especially when you use muted colors like sage green on off‑white. For a more sophisticated take, use a single metallic dot placed exactly in the center of each nail like a modern art piece. The best part about bobby pin dots is the easy cleanup: if a dot smears, simply wipe the nail with a bit of polish remover on a flat brush and try again. Because the dots are raised, they also add a subtle tactile element that makes people want to touch your hands.
Negative Space Crescent at the Base
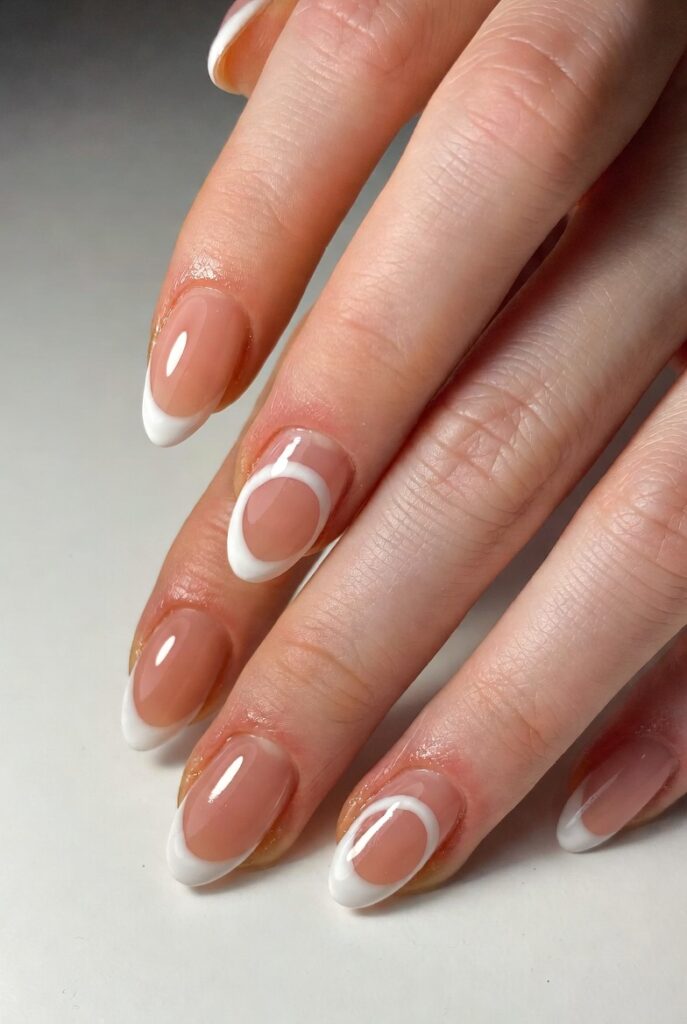
Leave the half‑moon area near your cuticle completely bare while painting the rest of the nail. This negative space design looks incredibly clean and modern, and it grows out without a harsh line. Use a reinforcement sticker (the kind for hole‑punched paper) or a small circular bandage to mask off the crescent shape. Paint two coats of your chosen color over the entire nail including the sticker, then peel it off while the polish is tacky.
The exposed natural nail acts as its own design element, so your manicure still looks intentional even after a week of regrowth. Soft pastels like powder blue or peach work best because they contrast gently with the pink of your bare nail. You can also paint the crescent itself instead of leaving it bare by applying the sticker in reverse. Many people find this design helpful when they have a small chip or peeling at the cuticle because the empty space disguises imperfections. Pair it with a glossy top coat only on the painted area for a two‑texture effect.
Diagonal Color Block with a Sharp Angle
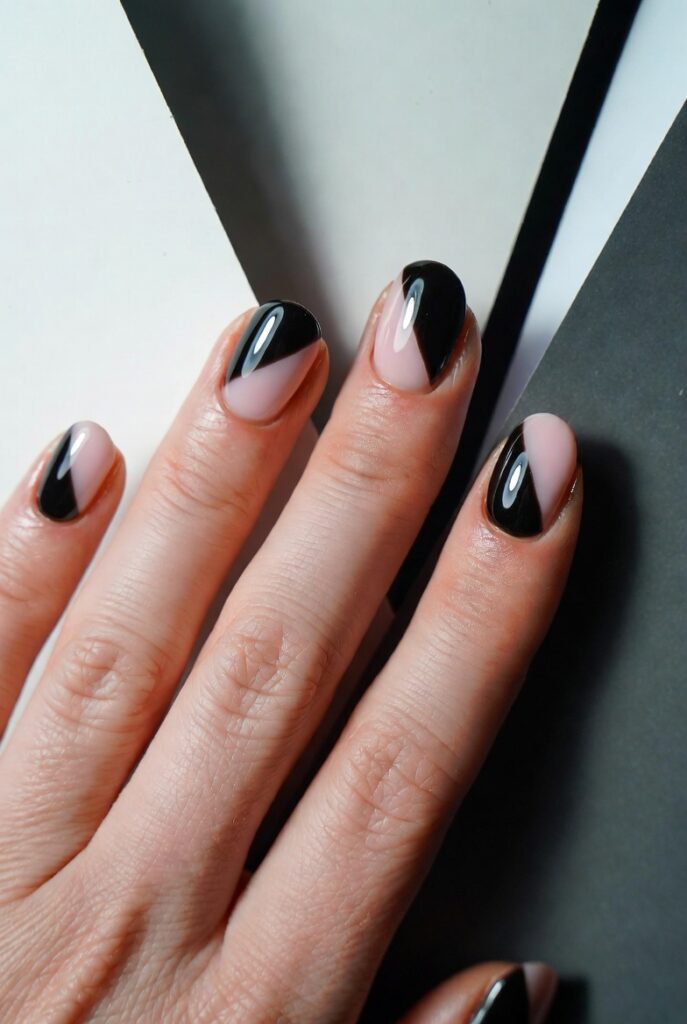
Instead of horizontal or vertical lines, try a diagonal slash from one side of the nail to the other. The angle naturally slims wider nail beds and adds dynamic movement to short nails. Paint your base color, let it dry fully, then use thin strips of washi tape or electrical tape to mask off the lower portion. Apply your second color at a forty‑five‑degree angle, overlapping the tape, then pull the tape away before the polish dries. The resulting edge looks crisp and architectural.
You can layer three different colors in diagonal segments, such as mustard yellow, terracotta, and rust, for a sunset gradient that requires no sponging. Because the diagonals point toward the fingertip, they draw the eye upward and make nails appear longer. This design forgives uneven application on the sides of the nail since the diagonal line acts as a strong visual anchor. For an evening look, use a black base and a gold metallic diagonal; the combination feels luxurious without needing glitter or gems.
Ombré with a Dry Sponge
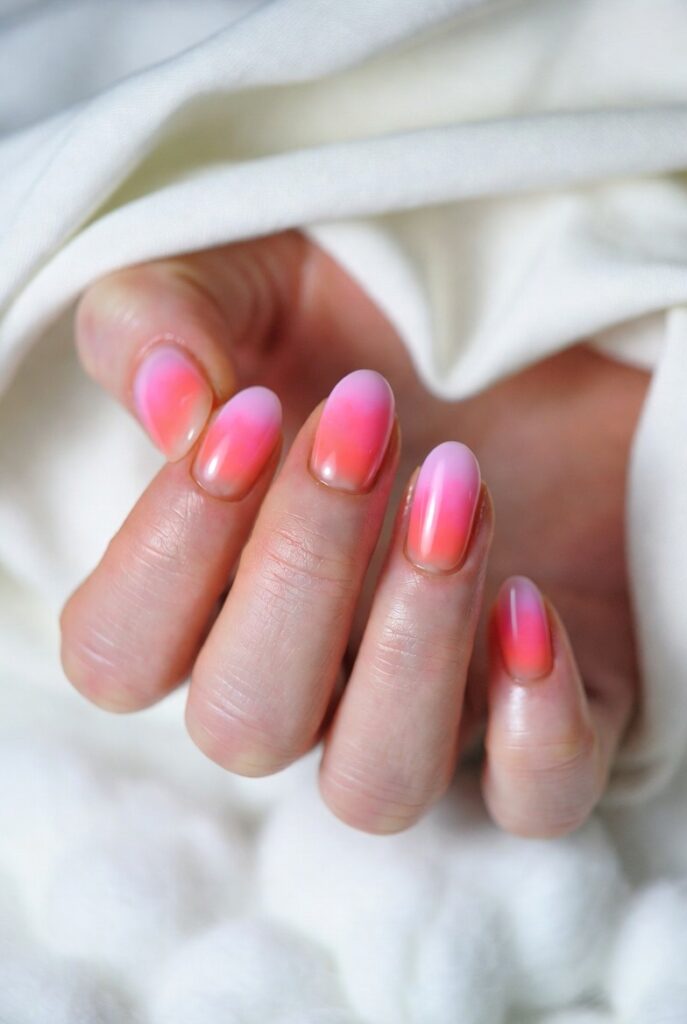
Achieve a gentle ombré effect using a dry eyeshadow sponge and only two polish colors. Paint your entire nail with the lighter shade as a base, then dab a small puddle of the darker shade onto a piece of plastic or foil. Press the sponge into the dark polish, then bounce it onto the tip of your nail, moving upward in tiny stippling motions. The sponge’s texture naturally breaks up the pigment, creating a soft fade that requires zero blending skill.
Pastel pink fading to coral works wonderfully for spring, while navy fading to pale grey feels cozy for winter. Do not worry about getting polish on your skin because you can clean the edges with an angled brush dipped in remover after the ombré dries. One common mistake is using too much dark polish; start with very little and build gradually. The finished look has a watercolor softness that makes simple nail designs look expensive and artistic. Since the sponge leaves a slightly textured surface, finish with two generous coats of quick‑dry top coat to smooth everything into a glassy finish.
Metallic Tip Only (Reverse French)
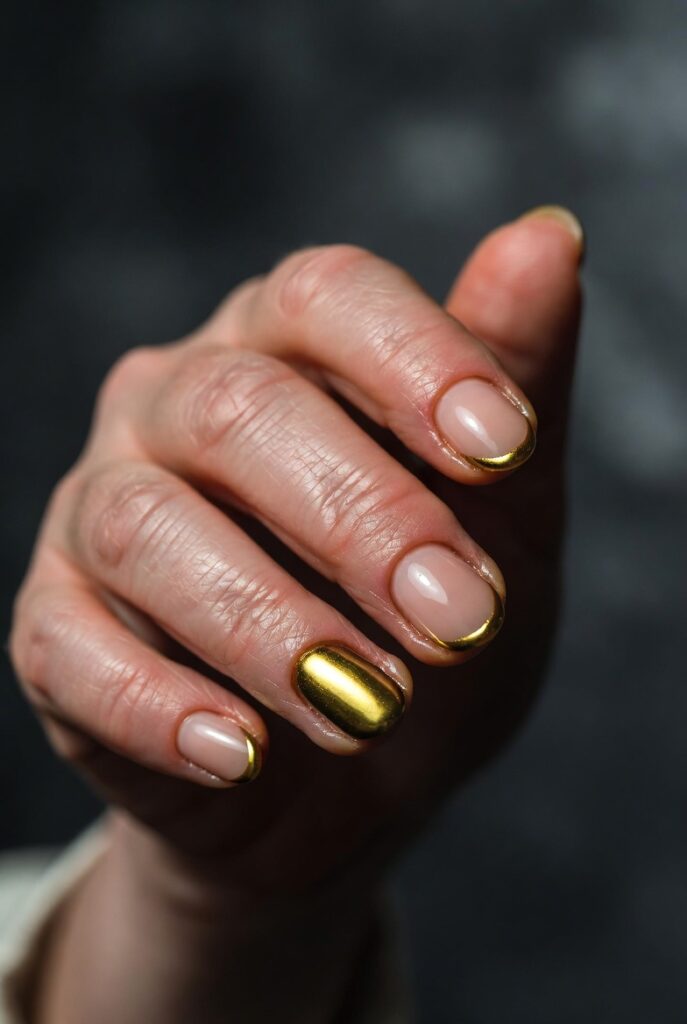
Flip the classic French manicure by painting only the tips with a metallic shade while leaving the rest of the nail bare or nude. Gold, rose gold, or copper tips catch light beautifully on short nails because the reflective surface creates a high‑contrast focal point at the free edge. Use the natural curve of your nail as a guide, painting a thin smile line with a steady hand. If you struggle with symmetry, place a small rubber band around your finger just below the tip and use it as a physical barrier.
This design looks particularly striking on almond‑shaped nails but also flatters square nails by softening their edges. Because the metallic polish is usually opaque, you only need one careful coat, making this one of the fastest designs on the list. You can vary the width of the tip from day to day—a thick band feels bold and editorial, while a whisper‑thin line feels delicate and feminine. Wear it with bare nails for a natural‑but‑polished look that works with both jeans and cocktail dresses.
Matte Finish with Glossy Spots
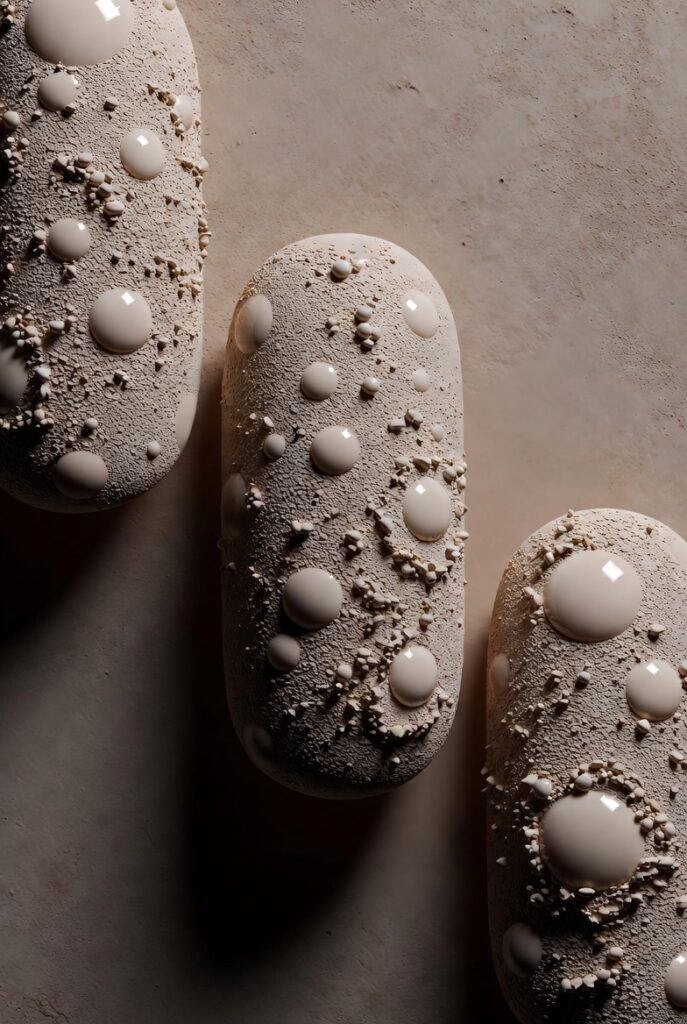
Transform any solid color into a high‑low texture design by combining matte and glossy finishes on the same nail. Paint your base color with a matte top coat over the entire nail, then use a detail brush to paint small shapes—triangles, dots, or wavy lines—with a regular glossy top coat. The contrast between the velvety matte background and the shiny raised pattern is subtle enough for the office but interesting enough to start conversations.
Deep jewel tones like emerald or sapphire work best because the glossy spots look like wet ink against the dry matte surface. Another easy method is to place a small piece of tape in a geometric pattern, apply glossy top coat over the whole nail, then remove the tape to reveal matte stripes. Because matte polish shows every ridge and bump, always start with a smoothing base coat to create a perfect canvas. This design lasts longer than you might expect because the glossy spots are actually a protective layer over the matte finish, reducing chipping at the tips.
Scattered Glitter Fade
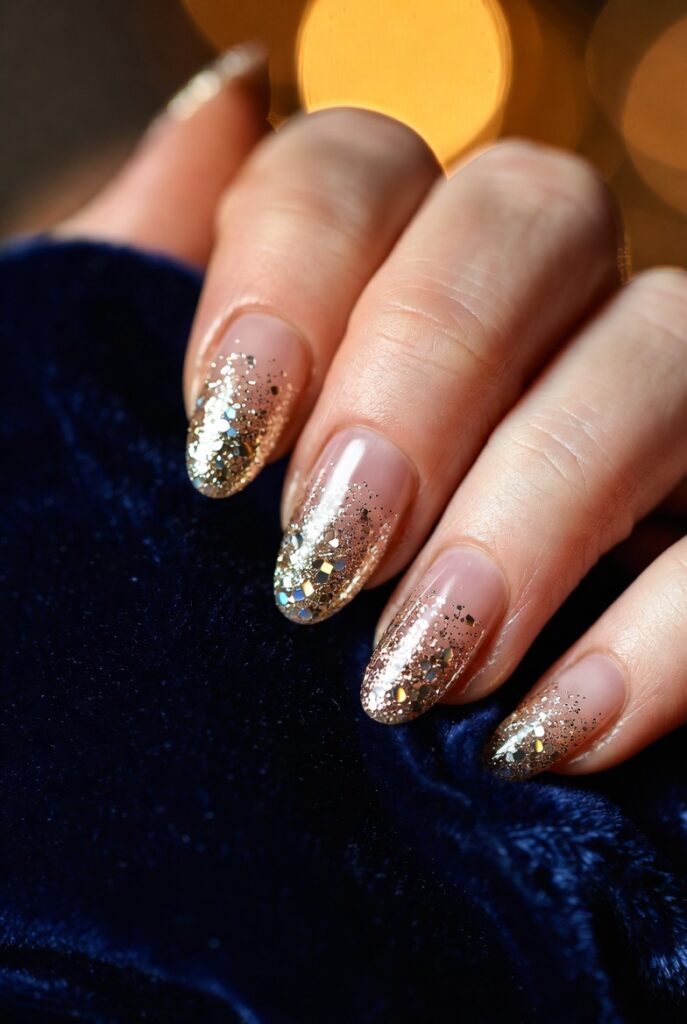
Instead of coating the entire nail in glitter, concentrate it near the cuticle or tip and let it fade to nothing. Use a loose glitter powder or a thick glitter polish, and dab it on with a fan brush or your fingertip. The key to a natural fade is to apply most of the glitter in a dense cluster, then wipe most of the product off the brush and lightly dust the remaining area. Clear polish mixed with fine holographic glitter creates a starry‑night effect that looks magical on short nails.
You can also layer two different glitter sizes: chunky hexagonal pieces near the free edge and micro‑fine sparkles spreading upward. This design hides regrowth beautifully because the dense glitter at the top draws attention away from the cuticle line. For a more refined take, use iridescent shimmer instead of metallic glitter—it catches light in pastel flashes of pink and gold without looking like a child’s craft project. Because glitter can be rough, seal the design with a thick, self‑leveling gel‑effect top coat to lock down every particle.
Marble Swirl with a Toothpick
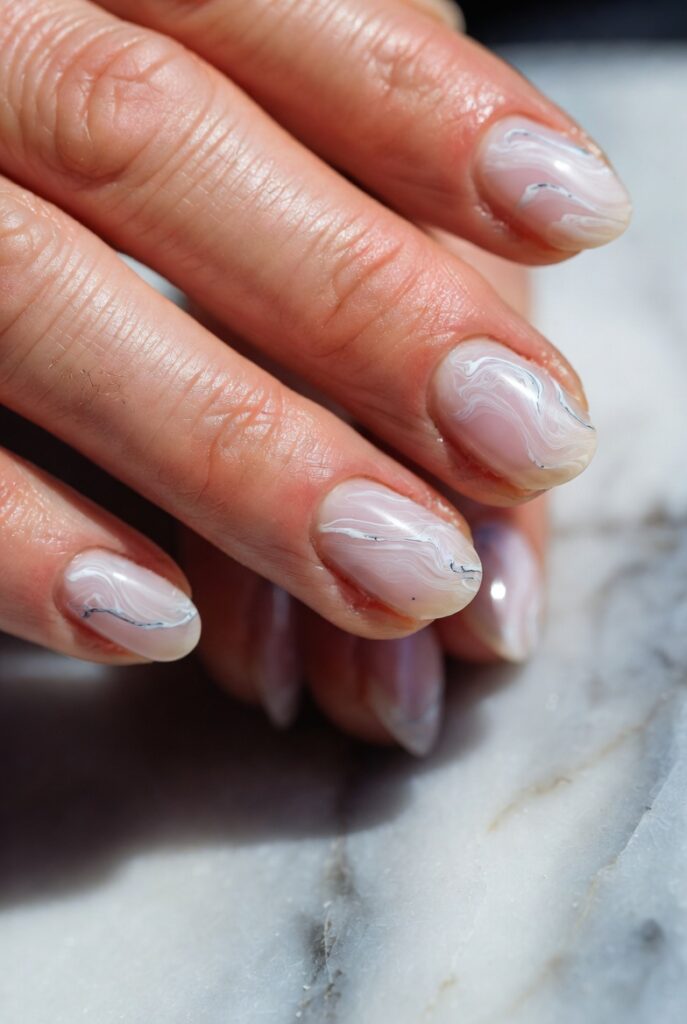
Create a fake marble effect using a toothpick and two contrasting polishes. Paint a white or cream base and let it dry completely. Drop two small puddles of different colors—say, grey and soft blue—onto the nail close together, then swirl them gently with the toothpick in figure‑eight motions. Do not over‑swirl; three or four passes are enough to create organic veins. The toothpick’s wooden tip naturally pulls the polish into thin, irregular lines that mimic real stone.
This technique works best when the two colors have similar opacity so neither overpowers the other. If the swirl looks messy on your first try, wipe it off and start again because the whole process takes less than two minutes per nail. Marble nails look especially sophisticated in monochromatic tones like black, white, and grey, but you can also use pastel pink and lavender for a candy‑marble effect. Because the design is chaotic by nature, every nail will look different, which feels intentional and artistic rather than mismatched.
Half‑Moon at the Side (Asymmetric Color)
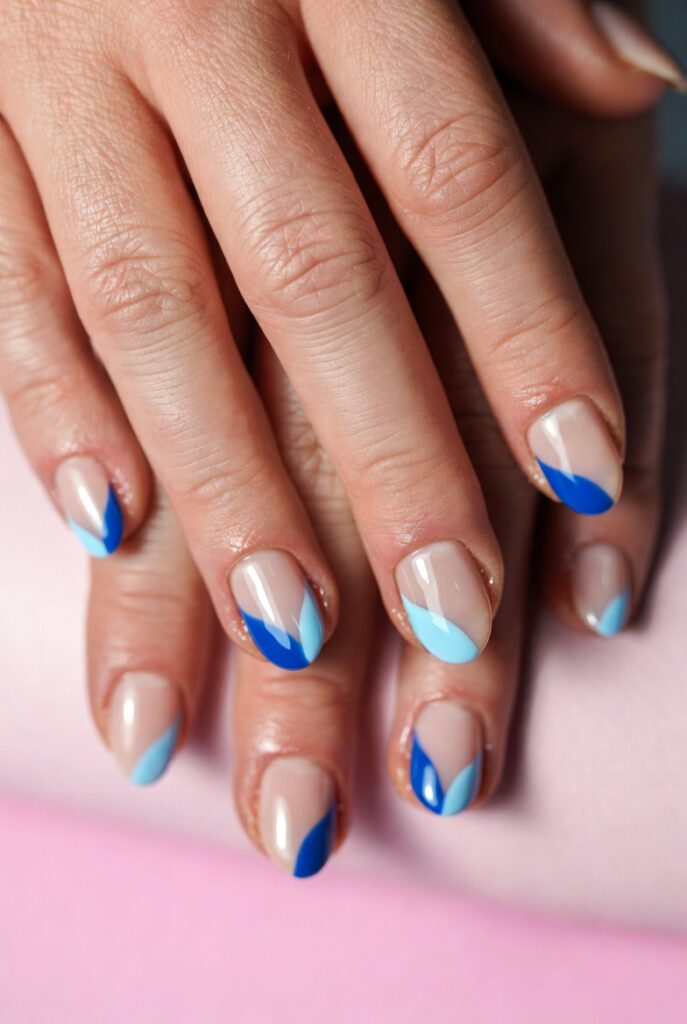
Paint a curved half‑moon shape not at the cuticle but along one side of the nail, hugging the edge like a parenthesis. This asymmetric pop of color draws the eye diagonally across the finger, creating a slimming illusion. Use a small detail brush or the side of a regular brush to paint a crescent that starts near the cuticle on the left side, arches to the middle of the nail, and returns to the cuticle on the right side. Leave the rest of the nail in your base color or bare.
This design feels fresh because it breaks the rule that nail art must be centered. Bright orange over a nude base looks sporty and unexpected, while dark burgundy over pale pink feels moody and romantic. Because the shape does not need to be perfectly symmetrical from finger to finger, you can relax and paint intuitively. Many people find this easier than traditional half‑moon designs because you are following the natural curve of your sidewall rather than fighting against it. Finish with a top coat that has a slight shimmer to add depth without distracting from the asymmetric shape.
Single Rhinestone at the Cuticle
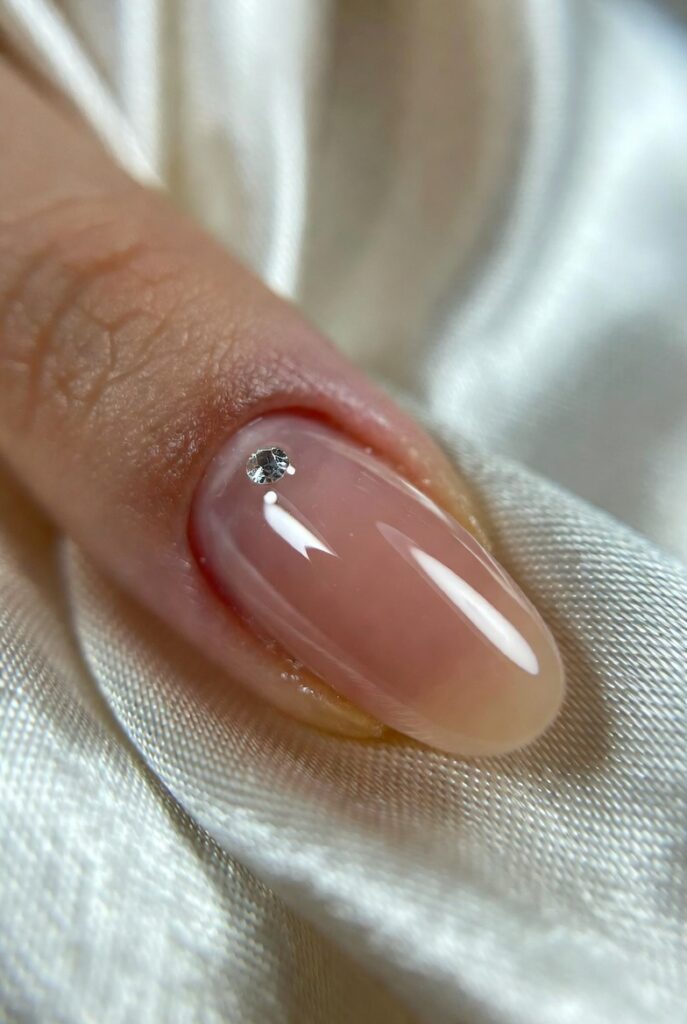
One small rhinestone placed precisely at the center of your cuticle line can elevate a plain manicure instantly. Use nail glue or a clear top coat to adhere a flat‑back crystal, then press it gently with a wax pencil or tweezers. The key is choosing the right size: a 2mm stone looks delicate on short nails, while 3mm overwhelms them. Silver or clear crystals work with any color, but you can also match the rhinestone to your jewelry—rose gold stones with rose gold rings, for example.
This design is ideal for special occasions because the single stone catches candlelight beautifully, but it is also subtle enough for daily wear if you use a tiny iridescent pearl instead of a diamond‑like crystal. Because the rhinestone sits at the cuticle, it does not interfere with typing or buttoning shirts. When the stone eventually falls off (usually after four or five days), the clean nail underneath means you can simply replace it without redoing the whole manicure. For a cohesive look, place the stone on the same finger on both hands, such as both ring fingers.
Striped Tape Manicure with Washi Tape
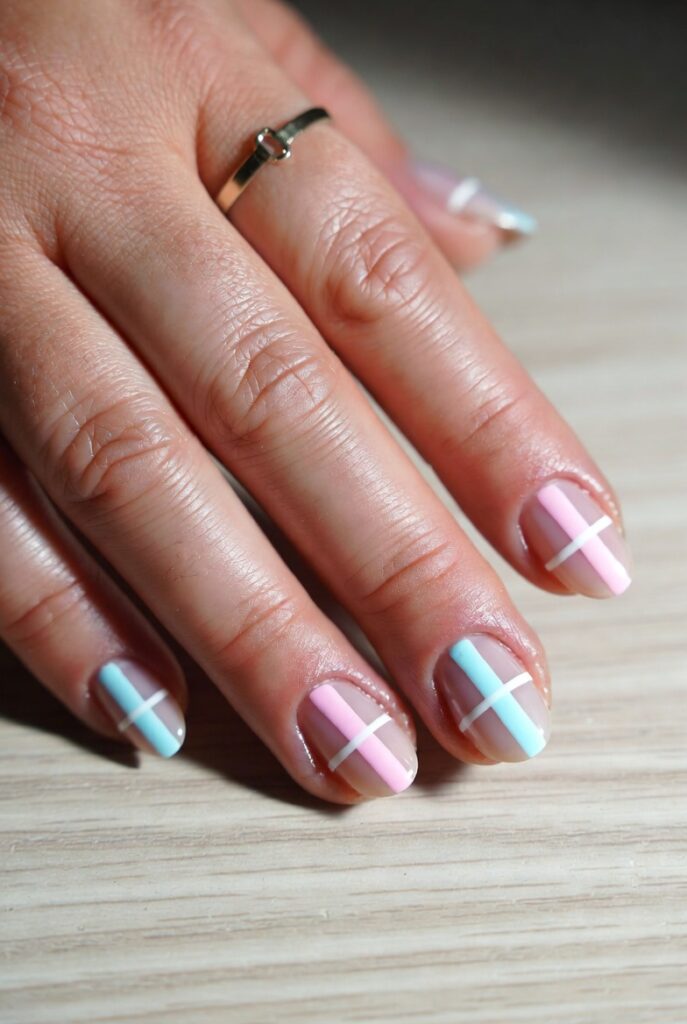
Washi tape is a nail artist’s secret weapon because it is low‑tack and peels off without lifting the polish underneath. Cut thin strips of washi tape and arrange them in parallel lines across the nail, leaving small gaps of base color showing through. Paint a contrasting color over the entire nail and tape, then peel the tape off while the polish is wet. The result is perfectly straight racing stripes with zero brushwork.
You can create plaid effects by laying vertical strips, painting, peeling, then laying horizontal strips and painting again with a different color. Because washi tape comes in various widths, you can achieve thin pinstripes or thick bands. This design works exceptionally well on long square nails where the stripes can run the entire length, but short nails look charming with just two stripes placed diagonally. The clean geometric lines make your manicure look professionally done even if your polish application underneath is slightly uneven.
Read also:20 Round Face Makeup Placement Ideas: Sculpt, Slim, and Shine with These Flattering Techniques
Watercolor Stain with Alcohol
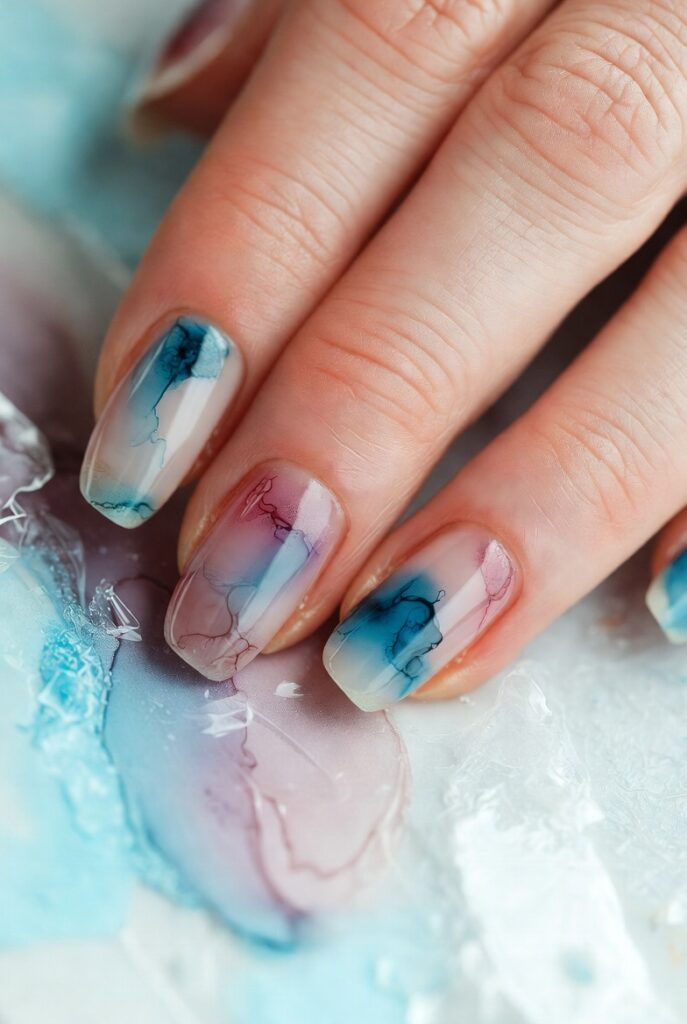
This technique produces a dreamy watercolor effect that looks complicated but is shockingly simple. Paint a white base and let it dry. Apply a small dot of colored polish (such as coral or lavender) onto the nail, then dip a clean eyeshadow brush in rubbing alcohol and touch it to the dot. The alcohol dissolves the polish, causing it to spread into a translucent, irregular stain with soft edges. Repeat with a second color, leaving the brush slightly damp so the colors bleed into each other.
The alcohol evaporates quickly, so you can build layers in minutes. This is one of the only designs where less control yields better results; the random flow of the stain creates organic floral or cloud‑like shapes. Because the polish becomes thin and watercolor‑like, it dries nearly flat, so you only need one top coat. This design is perfect for short nails because the soft blurring effect downplays the small canvas size. Use three analogous colors, such as pink, peach, and yellow, for a sunset watercolor, or blue and green for an underwater vibe.
Textured Knit Sweater Pattern
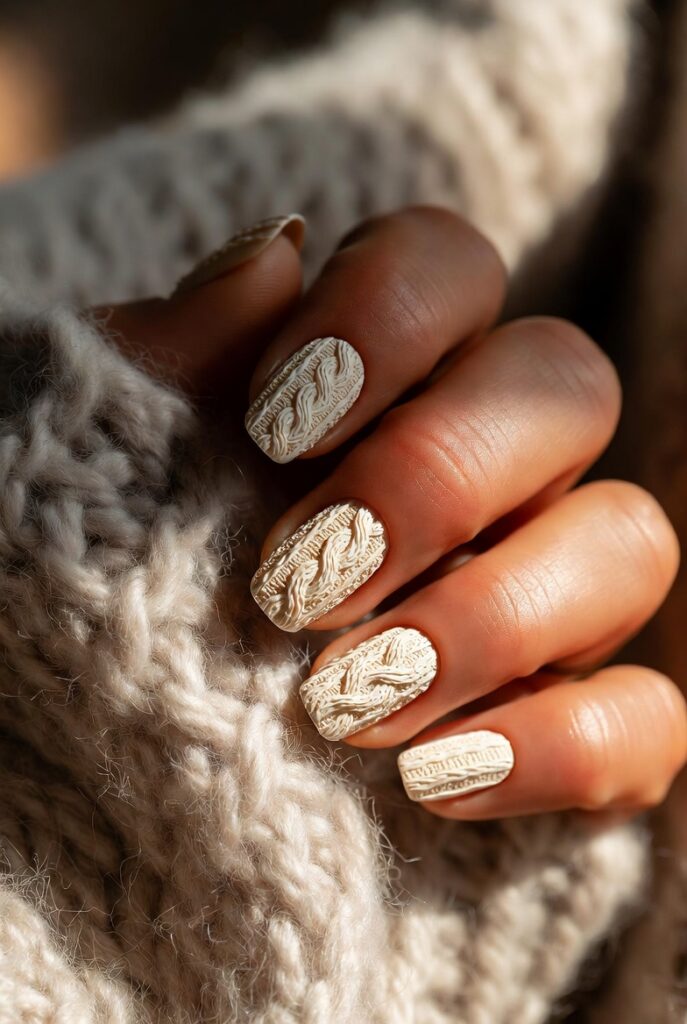
Use a matte top coat and a dotting tool to create raised lines that mimic a cable knit sweater. Paint your base color in a matte finish, then dip a small ball tool or the end of a paintbrush into a clear matte polish. Draw intersecting V‑shapes and vertical lines while the base is still slightly tacky, so the raised pattern adheres better. The clear polish dries with a subtle sheen that contrasts against the flat matte background while also standing up in thin ridges you can feel with your fingertip.
This design works beautifully in winter shades like oatmeal, charcoal, or burgundy. Because the pattern is tactile, it invites touch and looks especially cozy on shorter, rounder nail shapes. You can also achieve a similar effect by using a thick gel top coat and curing it under a lamp, but regular polish works fine if you apply two layers of the raised pattern. The sweater texture hides small chips remarkably well since the uneven surface distracts the eye from edge flaws.
Dotted Arch Over the Smile Line
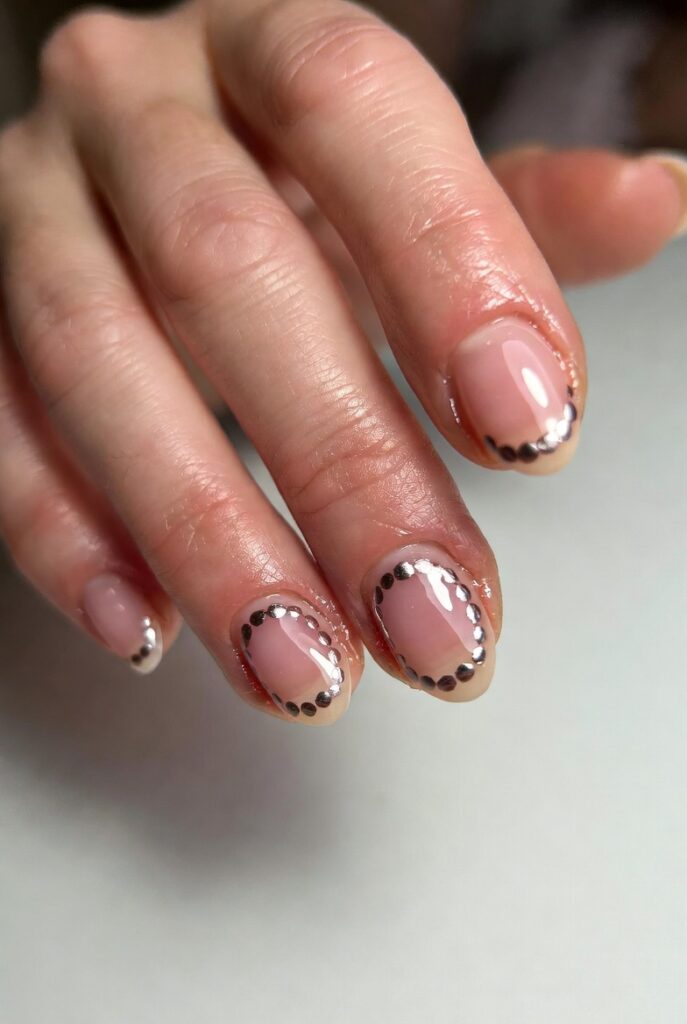
Create a row of tiny dots that traces the natural curve of your smile line (the line where the white free edge meets the pink nail bed). Using a bobby pin or toothpick, dip into a bright polish and make five to seven dots that form a gentle arch. This design looks like a string of pearls resting just above the tip and works on both natural and artificial nails. The arch draws attention to the free edge, making short nails appear longer by creating an artificial boundary lower than your actual tip.
White dots over a red base feel classic and retro, while neon dots over black feel edgy and modern. Because the dots are small and separated, you can easily fix a misplaced dot by scraping it off with an orange stick without ruining the whole nail. This is one of the few designs that actually looks better when the dots are not perfectly uniform, since slight size variations mimic natural seed beads. Finish with a thick top coat to round each dot into a tiny dome that catches side lighting.
Reverse Ombré (Dark to Light)
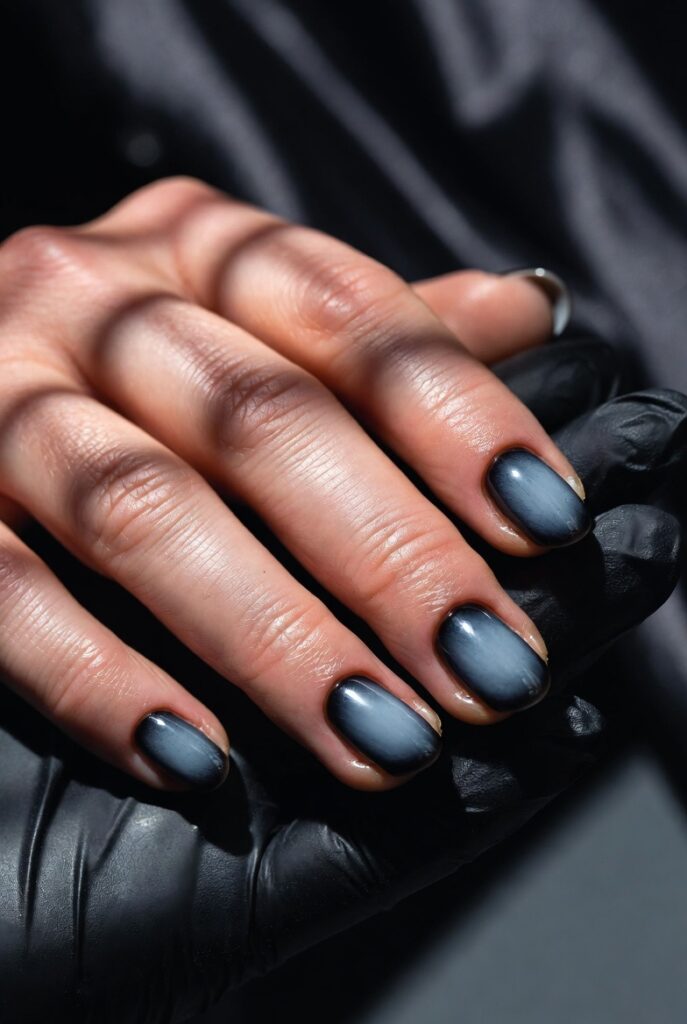
Instead of fading from light at the cuticle to dark at the tip, reverse the gradient so the darkest color is at the cuticle and it lightens toward the free edge. Paint a dark base like navy blue, then sponge a medium blue in the middle and a pale blue at the tip. The effect is moody and unexpected, drawing the eye inward rather than outward. This works especially well on short nails because the dark cuticle area visually recedes, making the lighter tip appear to float forward.
Use a makeup sponge and the same dry‑sponge technique described earlier, but start dabbing the dark color at the top (cuticle area) and work downward. Because the cuticle area is hardest to paint neatly, the reverse ombré actually hides ragged edges better than a traditional ombré. Pair a black cuticle with a silver tip for a chrome‑like gradient, or a wine red cuticle fading to pale pink for a romantic stained‑glass look. The reverse pattern also grows out more gracefully because the dark color at the base makes new nail growth less visible for the first week.
Minimalist Single Line Along the Sidewall
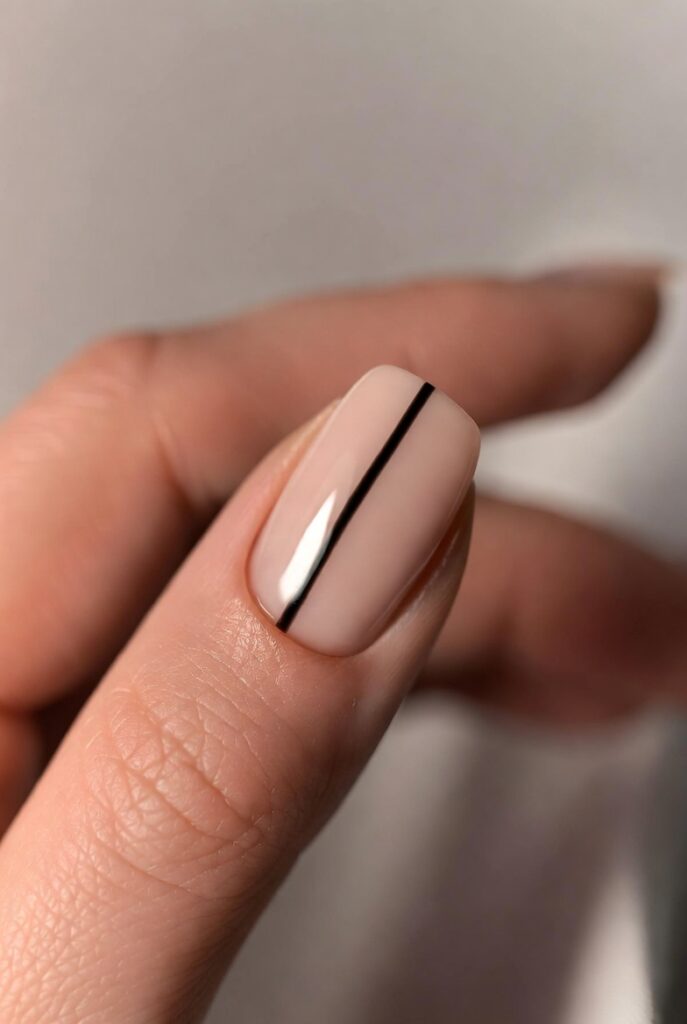
Paint one thin, continuous line that runs parallel to your sidewall, starting at the cuticle and ending at the free edge. This asymmetric line design is the nail equivalent of a delicate necklace—subtle but striking. Use a striping brush or the long thin brush from a polish bottle, and rest your pinky finger on the table to steady your hand. The line should sit about one millimeter away from the actual side of your nail, creating a negative space border.
Black line over a sheer nude base looks elegant and architectural, while a white line over a pastel base feels fresh and springy. Because the line is so thin, any wobbles look like intentional calligraphy rather than mistakes. You can also paint two parallel lines for a double‑stripe effect, or let the line trail off into a tiny dot at the free edge. This design takes under two minutes for all ten nails and dries almost instantly, making it perfect for a last‑minute event. It also pairs beautifully with gold rings worn on the same finger, as the line echoes the ring’s metal.
Pressed Dried Flower Under Top Coat
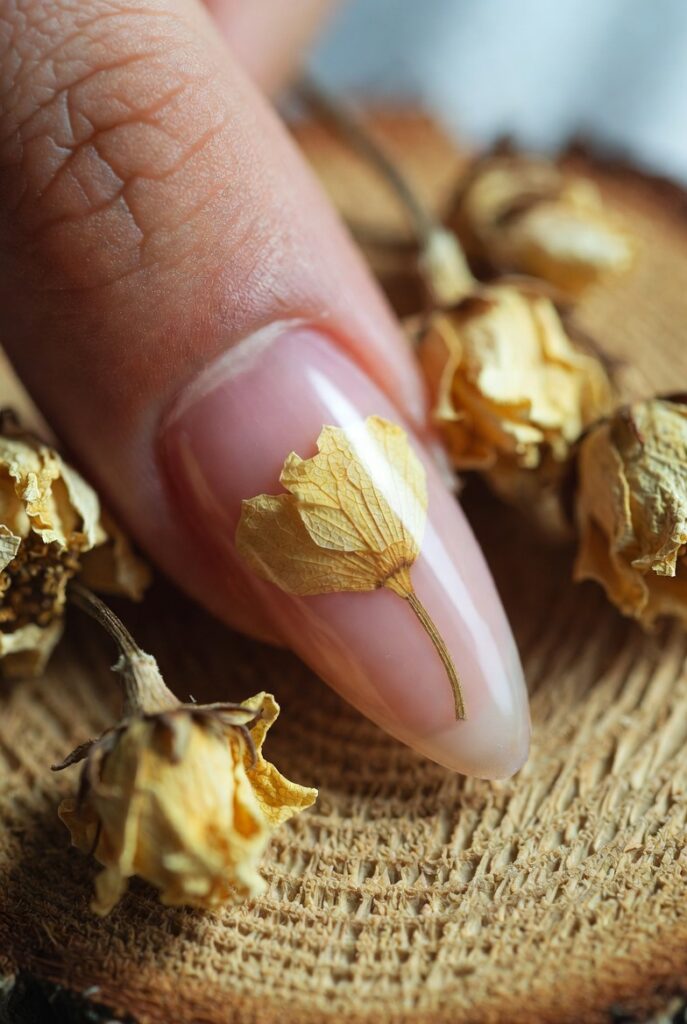
Use real dried flowers (sold in craft stores for resin jewelry) to create a botanical nail design that feels romantic and one‑of‑a‑kind. Paint a sheer nude or white base, then place a tiny dried flower—such as a mini daisy or baby’s breath—onto the tacky polish with tweezers. Gently press the flower flat, then seal with two thick layers of top coat, waiting for the first layer to dry completely before adding the second. The clear top coat encases the flower, making it look like a museum specimen preserved in glass.
Because the flowers are paper‑thin, they lie flush against the nail and do not snag on hair or clothing. This design is especially meaningful if you press your own tiny blooms from a garden or a special occasion bouquet. Short nails work better than long nails because smaller flowers fit proportionally. For a coordinated look, place one flower on each ring finger and leave the rest solid, or scatter tiny petals across all ten nails like confetti.
Saran Wrap Smash Texture
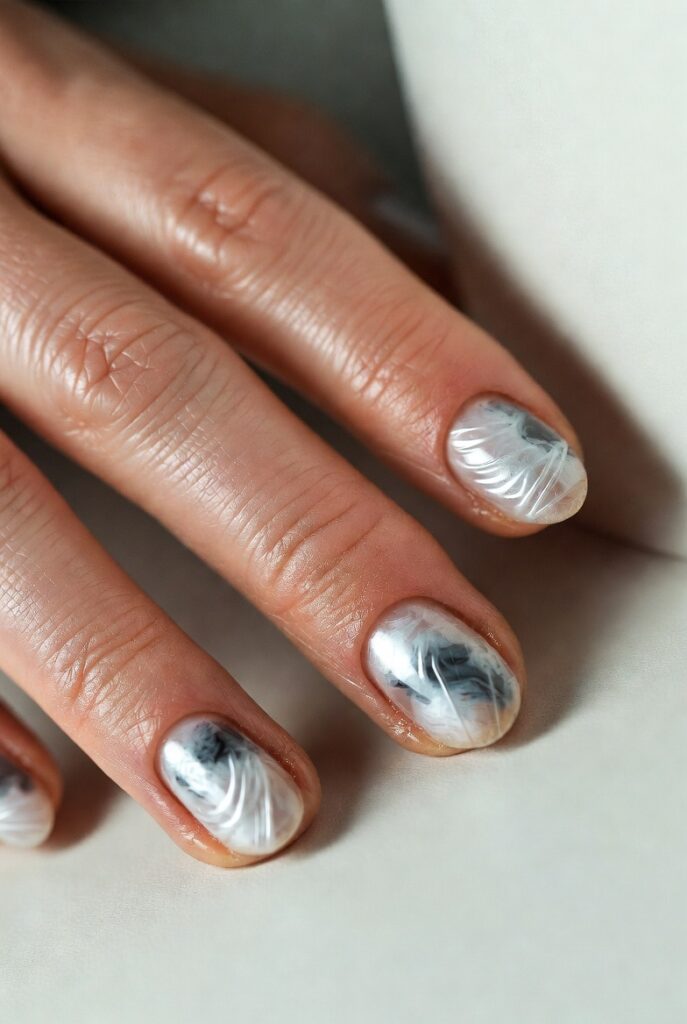
Apply a base color and let it dry completely. Paint a second, contrasting color over the entire nail, then immediately press a crumpled piece of plastic wrap onto the wet polish. Lift the wrap off in one motion; the plastic leaves behind a random organic texture that resembles cracked leather or stone. This is one of the fastest nail designs because the whole process takes thirty seconds per hand. The key is to crumple the plastic wrap beforehand so it has deep creases, and to use a fresh piece for each nail to avoid muddying the colors.
Black over silver creates a snake‑scale effect, while white over pale pink looks like delicate porcelain crazing. Because the texture is chaotic, there is no wrong way to do it—every nail will be different, and every difference adds interest. You can also use a plastic grocery bag instead of Saran Wrap for larger, more dramatic cells. Finish with a glossy top coat to smooth the texture, or leave it matte for an even more pronounced leather‑like feel.
Colored French with a Sharpie
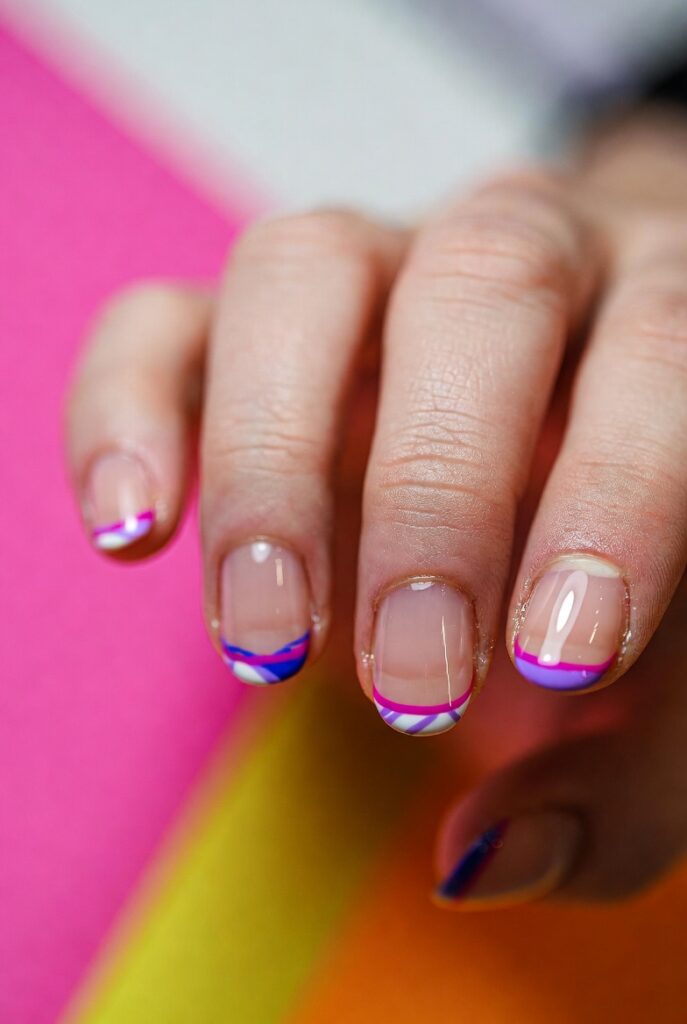
Forget nail brushes—a permanent marker in a bright color can create the thinnest, most perfect French tip you have ever seen. Paint a clear base or nude base, let it dry, then use a fine‑tip Sharpie to draw a delicate line along the free edge. The marker flows smoothly and dries instantly, and you can wipe away mistakes with rubbing alcohol without damaging the base polish. This technique is ideal for creating ultra‑thin tips in colors like electric blue, neon pink, or bright yellow—shades that are often watery and hard to control in traditional polish form.
Because the marker tip is so precise, you can also draw zigzag tips, wavy tips, or two‑tone tips by layering different colors. The marker lasts for several days under a clear top coat but will eventually smudge if you skip the top coat. This is a lifesaver for travel: pack a Sharpie and a small bottle of clear polish, and you can refresh your French tips in a hotel room in ninety seconds. The bold color choice also makes short nails look intentionally edgy rather than simply unpainted.
Barely‑There Glitter Speckles
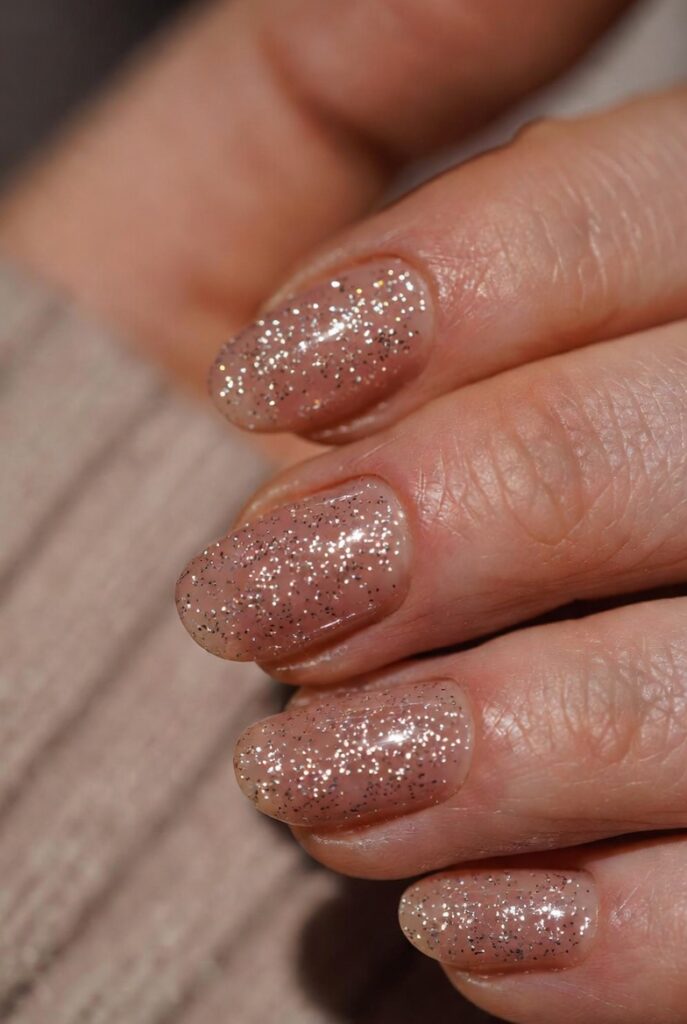
Finish this list with the quietest design of all: micro‑fine glitter suspended in clear polish applied as a single sheer coat over bare, buffed nails. This is not a glitter bomb but a whisper of sparkle that only reveals itself when you move your hands. Mix a tiny pinch of ultrafine holographic glitter into a bottle of clear top coat, or buy a pre‑made “nail confetti” topper. Paint one thin coat over clean, shaped nails with no base color, letting the natural pink of your nail bed show through completely.
The result looks like sunlight catching tiny dust motes—barely there but undeniably magical. This design is the ultimate proof that simple nail designs can be the most powerful, because it requires zero skill, works on any nail length or shape, and takes less than five minutes from start to finish. It also grows out invisibly, so you can ignore your nails for three weeks and they will still look intentionally understated. Wear this to job interviews, first dates, or any situation where you want to feel polished without announcing that you are wearing nail polish. Sometimes the simplest tip is the one you use most often.
Conclusion
Simple nail designs do not demand a professional studio or a drawer full of gadgets. With everyday items like bobby pins, tape, sponges, and even permanent markers, you can create manicures that feel fresh, personal, and wonderfully achievable. The twenty‑three ideas shared here are meant to be mixed, matched, and adapted to your own rhythm—whether you have five minutes or fifty, steady hands or shaky ones. Confidence comes not from perfection, but from the quiet joy of wearing something you made yourself. So pick one design that makes you smile, gather your favorite polish, and give yourself the gift of a little creative break. Your nails will thank you, and so will your mood.

Mehboob Ahmad is the founder and writer behind BeautyVibeWorld. With a genuine passion for skincare, makeup, and everyday beauty routines, Mehboob started this platform to share simple, practical, and research-backed advice that real people can actually use without the confusion of conflicting trends and overhyped products.
Every article on BeautyVibeWorld is written with care, backed by research, and regularly updated to stay accurate and relevant. Mehboob believes good beauty advice should be honest, easy to follow, and free of unnecessary complexity.
Outside of writing, Mehboob enjoys exploring new beauty trends and staying up to date with the latest in skincare and haircare research to keep bringing fresh, reliable content to BeautyVibeWorld readers.